Loan Calculator using PyQt5 in PythonThis article will demonstrate how to use PyQt5 to develop a loan calculator. A complete set of Python bindings for Qt v5 is available as PyQt5. Cross-platform GUI toolkit PyQt5 is a collection of Python bindings for Qt version 5. The capabilities and simplicity offered by this toolkit make it quite simple to create an interactive desktop application. On all platforms that are supported, including iOS and Android, it enables Python to be used as an alternative to C++ for application development. It is implemented as more than 35 extension modules. This post is mainly about building a loan calculator using the Python library called PyQt5. A loan is a legal agreement between a borrower and a lender whereby the borrower gets a sum of money (the principle) that they must later repay. And, to calculate this value, we use Loan Calculator. This Loan Calculator will be built using the PyQt5 library. So, we will start with the basic instructions to be followed. Steps for implementing a GUI :
Implementation steps on the back end :
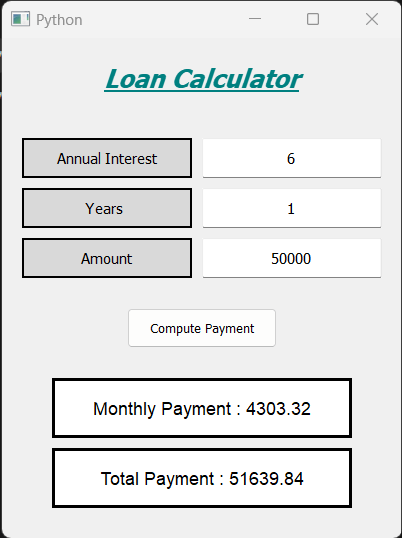
Walking through the code :First of all, to begin with, we imported all the required modules into our program. The files we imported include QtWidgets, QtCore, QtGui and sys. Then, we created a new class which contains the constructor to initialise our function. Next, we set the title, width and height of the window. Also, we defined the window's geometry. Then, we displayed all the widgets present. Then we defined another function in which we will be creating the heading and various labels and setting their properties. Next, we set the heading for the loan calculator and set its position and geometry along with the font properties and colour effects. Then, we created various labels and set their properties. The labels were annual interest, years and amount. They were first created, then we defined their properties and set their positions. Then we also defined their font styles and sizes for displaying. Along with these labels, we also created simultaneous labels for the text to be entered or displayed, i.e. textareas. Then we created a push button and payment labels. For the button, we first created it, then set its geometry and then added functionality to it in order to perform a function on being clicked. Then we created a monthly payment label and defined its properties and font. Similarly, we created a yearly payment label and defined its properties and fonts too. Then, we created a function to calculate monthly and yearly payments. The entire result was based also on the annual interest rate variable's value and the no. of months value and the values which were not in numerical form were converted to integers from text. And after the final calculation the value was derived by a certain mentioned formula and was stored in total payment variable. Finally, we created the instance of the window for displaying the application and then executed the application by calling the exit() method from the system. Complete Code :Output: The output of the above-mentioned code is attached below as a screenshot.  Next TopicFlappy Bird Game using PyGame in Python |

We provides tutorials and interview questions of all technology like java tutorial, android, java frameworks
G-13, 2nd Floor, Sec-3, Noida, UP, 201301, India


