Binding Method in Python TkinterIn the following tutorial, we will discuss the concept of binding used in Tkinter in Python programming language. But before we start with the topic, we must remember that the Tkinter package of Python is used for designing Interfaces based on Graphical User Interface (GUI). Tkinter has a wide range of built-in functionalities and extensions that can be utilized in order to improve the overall performance and functionality of the application. Understanding the bindThe fundamental definition of the term "bind" is to stick together or cause to stick together in a single mass. In the same way, the bind() method of Tkinter is utilized to connect an event passed in the widget along with the event handler. The event handler is the function invoked when the events occur. Let us now consider the syntax of the bind() method of Tkinter: Syntax: The sequence parameter describes what event we expect, and the func parameter is used to define the function to be called when that event happens to the widget. If there was already a binding for that event for this widget, the old callback is replaced with func; however, we can preserve both callbacks by passing add = '+'. We can bond the events to an event handler with the help of the bind() method at various levels.
Instance-level BindingWe can bind an event to a specific widget. In order to bind an event of a widget, we will call the bind() method on that widget. Syntax: Parameters:
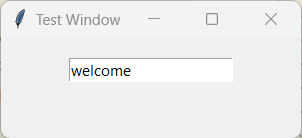
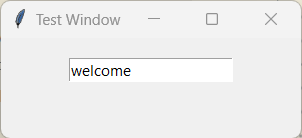
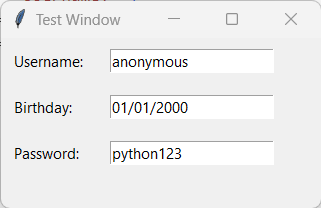
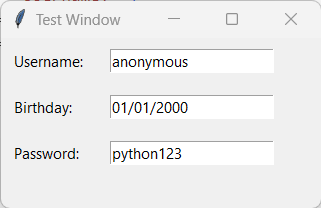
Let us consider the following example illustrating how to bind an event to a specific instance of a widget. Example: Output: - A Key has been Pressed. A Key has been Pressed. A Key has been Pressed. A Key has been Pressed. A Key has been Pressed. A Key has been Pressed. Explanation: In the above snippet of code, we have imported the tkinter module. We have then defined the class as DisplayWindow() to build GUI. Within this class, we have defined an initializing function to design the main window. We have called the Tk() class to create an empty window. We have configured the size and position of the window using the geometry() method and set its title with the help of the title() method. We have then created an entry field using the Entry() widget and used the bind() method to bind the key press event to the event handler function. We have then positioned the entry field with the help of the pack() method with y-coordinate padding 20. We have then called the mainloop() method to display the window. We have then defined an event handler function as on_key_press(). We have used the print() method within this function to print a message whenever a key is pressed. At last, we have instantiated the DisplayWindow() class. As a result, a window appears on the screen with an entry field when we run the code. Moreover, when we type "welcome" in the entry field, the message "A Key has been Pressed." is printed in the command prompt seven times, indicating that the keys have been pressed seven times. Understanding the concept of Multiple BindingWhat if we require binding multiple functions to a specific widget? Passing two statements consisting of the bind() method will certainly not work because the second statement will override the first one; therefore, only the second function will be invoked, as shown in the following example: Example: Output: As a GUI:  In Command Prompt: Explanation: In the above snippet of code, we have imported the tkinter module. We have then defined the class as DisplayWindow() to build GUI. Within this class, we have defined an initializing function to design the main window. We have called the Tk() class to create an empty window. We have configured the size and position of the window using the geometry() method and set its title with the help of the title() method. We have then created an entry field using the Entry() widget and used the bind() methods twice to bind the return key press event to two different event handler functions. We have then positioned the entry field with the help of the pack() method with y-coordinate padding 20. We have then called the mainloop() method to display the window. We have then defined an event handler function as on_first_return(). We have used the print() method within this function to print a message whenever the return key is pressed once. Similarly, we have defined another event handler function as on_second_return() to return a message whenever the return key is pressed twice. At last, we have instantiated the DisplayWindow() class. As a result, a window appears on the screen with an entry field when we run the code. Moreover, when we type "welcome" in the entry field and press 'Return' key, the message "The Return Key has been pressed twice." is printed in the command prompt. We can resolve this issue by inserting an extra parameter, 'add', to the second statement that uses the bind() method. Moreover, don't forget to assign 'add = "+"'. This method will invoke both functions. Thus, we can enable multiple binding in Tkinter. Let us consider the following implementation of the above statement. Example: Output: As a GUI:  In Command Prompt: Explanation: In the above snippet of code, we have imported the tkinter module. We have then defined the class as DisplayWindow() to build GUI. Within this class, we have defined an initializing function to design the main window. We have called the Tk() class to create an empty window. We have configured the size and position of the window using the geometry() method and set its title with the help of the title() method. We have then created an entry field using the Entry() widget and used the bind() methods twice to bind the return key press event to two different event handler functions. In the second bind() method, we have included the add parameter assigned to "+". We have then positioned the entry field with the help of the pack() method with y-coordinate padding 20. We have then called the mainloop() method to display the window. We have then defined an event handler function as on_first_return(). We have used the print() method within this function to print a message whenever the return key is pressed once. Similarly, we have defined another event handler function as on_second_return() to return a message whenever the return key is pressed twice. At last, we have instantiated the DisplayWindow() class. As a result, a window appears on the screen with an entry field when we run the code. Moreover, when we type "welcome" in the entry field and press 'Return' key, both functions run properly and printed their respective statements in the command prompt. Class-level BindingWe can bind an event to all widgets of a class. For instance, we might set up all Button widgets in order to respond to middle mouse button clicks by altering back and forth between French and Spanish labels. We can bind an event to all widgets of a class by calling the bind_class() method on any widget. The term "class" mentioned in the bind_class() method refers to the name of the internal class utilized by the Tkinter library, not the python class name. The bind_class() method is available to all widgets and used to call the Tkinter bind command again, but with the name of the widget class. The following is the syntax of the bind_class() method: Syntax: The fundamental working of the bind_class() method is the same as the bind() method. For example, we have some widgets of the same class and multiple entry widgets, and we are required to set all of them to the same function. Instead of calling the bind() method for every one of them, we can simply set them all up with one call as shown in the following snippet of code. Example: Output: As a GUI:  In Command Prompt: Explanation: In the above snippet of code, we have imported the tkinter module. We have then defined the class as DisplayWindow() to build GUI. Within this class, we have defined an initializing function to design the main window. We have called the Tk() class to create an empty window. We have configured the size and position of the window using the geometry() method and set its title with the help of the title() method. We have then used the Label() widget to create some labels to display information to the users. We have then created an entry field using the Entry() widget and used the bind_class() method to bind the return key press event of the entry fields class to an event handler function. We have then positioned the labels and entry fields with the help of the grid() method. We have then called the mainloop() method to display the window. We have then defined an event handler function as on_return(). We have used the print() method within this function to print a message whenever the return key is pressed. At last, we have instantiated the DisplayWindow() class. As a result, a window appears on the screen with an entry field when we run the code. Moreover, when we enter the asked details in entry field of the application and press 'Return' key, the event handler function is called, and the statement is printed in the command prompt. Application-level BindingWe can also set up a binding so that a certain event calls a handler no matter what widget has the focus or is being utilized. This method, called the bind_all() method, is used to bind events on the application level. Let us consider the syntax of the bind_all() method as shown below: Syntax: The bind_all() method is similar to the bind() method; however, it applies to all widgets in the entire application. For example, we might have some widgets of the same type throughout the program, which may be part of different classes. We can call the bind_all() method on any widget in order to bind an event at the application level. We are not required to mention the class name while utilizing bind_all() because the binding is applied to every event of the application. Let us consider the following example demonstrating the implementation of the bind_all() method. Example: Output: As a GUI:  In Command Prompt: Explanation: In the above snippet of code, we have imported the tkinter module. We have then defined the class as DisplayWindow() to build GUI. Within this class, we have defined an initializing function to design the main window. We have called the Tk() class to create an empty window. We have configured the size and position of the window using the geometry() method and set its title with the help of the title() method. We have then used the Label() widget to create some labels to display information to the users. We have then created an entry field using the Entry() widget and used the bind_all() method to bind the return key press event of the entry fields class to an event handler function. We have then positioned the labels and entry fields with the help of the grid() method. We have then called the mainloop() method to display the window. We have then defined an event handler function as on_return(). We have used the print() method within this function to print a message whenever the return key is pressed. At last, we have instantiated the DisplayWindow() class. As a result, a window appears on the screen with an entry field when we run the code. Moreover, when we enter the asked details in entry field of the application and press 'Return' key, the event handler function is called, and the statement is printed in the command prompt. The ConclusionIn the above tutorial, we have understood that Tkinter's bind() method is used to join or associate an event with a specific function known as an event handler for a widget. Moreover, we have also learned the Tkinter package supports three levels of binding: Instance-level Binding, Class-level Binding, and Application-level Binding. |